Ever wondered how bloggers participate in a number of different campaigns, and manage to connect and create with some of the most famous brands? Everyone has to start somewhere and often the way to do it is by promoting yourself. While having social media channels is great, another useful idea is preparing a media kit to send to people you want to work with.
What’s a media kit?
Think of it as a CV for your blog. It’s essentially a document that you send to companies and brands when you view them as potential collaborators, sponsors and advertisers. It’s a tool that helps you communicate better your ideas and interests, but also one which shows your awareness of the blogging business. Plus, it will make you look a lot more professional if designed well.
In other words, to create a media kit is to put your biography – including the mission, philosophy and idea of your blog, plus recent examples of your work – in the space of few pages, to be send to potential sponsors, partners and advertisers.
What do I need for my media kit?
There isn’t one universal style or pattern you need to use when creating a media kit. On the contrary, different thinking is encouraged, so you should do a bit of research into existing templates and then bring your A-game as you gather your finest photos to include.
To save you some of the trouble, we have made things easier for you and prepared you a list of 10 things to consider when creating your media kit:
1. Reiterate your blog’s mission
Let’s backtrack a little bit. When you first set up your blog, what was your mission? Is this still your mission today?
When you have a clear mission – and mission statement,- readers should know what they are getting from the blog, and brands, in turn, should know that this is the right place to get their product or service in front of their readers.
The Content Marketing Institute has some great tips about breaking down a mission statement:
Inc. magazine has its mission statement in the first line of its About Us page.
Let’s dissect this a bit. Inc’s mission statement includes:
- The core audience target: entrepreneurs and business owners
- What will be delivered to the audience: useful information, advice, insights, resources, and inspiration
- The outcome for the audience: growing their businesses
If you haven’t already, craft a mission statement and post it where readers can read it – and include it in your media kit as well.
The mission statement of your blog should determine the look and feel of your media kit, so spend some time on getting it right!
You have to keep it brief, but make it exciting.
2. Match your media kit’s design with your blog’s mission
This is the part where you get all your visual elements together.
Logo. Many bloggers nowadays have a logo, in addition to a regular title. If you have a logo, include it on all pages of your media kit. (Hint: if you do not have a logo, this might be the time to get one done, you can do it yourself if you have graphic design skills, or have it done by a graphic designer. Services such as Fiverr can help you find a logo designer within minutes.)
Branding: fonts, colors, shapes, etc. The logo may or may not have come before designing the general branding for the blog. But all in all, the colors, fonts, shapes you use in your media kit should match your blog.
Photo: First of all, you need to pick a recent and preferably professional photo of yourself (if you blog about yourself; if you have a cooking blog focused exclusively on food, this is less important), which is going to represent your blog, just like when you create a CV.
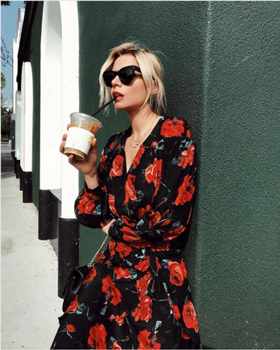
Veronica Ferraro
The photo by blogger Veronica Ferraro demonstrates a couple of things – (1) she’s a fashion blogger; (2) she’d be interested collaborating with brands that offer beverages, such as a hip bubble tea place or newly opened caffé; (3) she’s not afraid to experiment, to be bold and creative, to be in front of the camera, which are all great qualities.
Some bloggers choose the photo first and then the palette for the media kit, that is an option, too. In Veronica’s case, the perfect colour scheme is likely to include white, red and black, which is ultimately a strong palette!
Format: PDF is the best format. You’ll find some websites at the end of the article that can help you build your media kit. Alternatively, you can do it yourself by using the software from the Adobe family: Adobe Photoshop to create it page by page, for example, and then create a single PDF file with Adobe Acrobat Pro.
3. Get real with statistics
Show what have you accomplished so far – followers, posts per week, per month, percentage increase.
Let’s look at Eva from My Life as Eva. For someone who just started following her, they’d notice she has 5,5 million followers and that’s she’s often wearing a brand It’s All Wild, which is, in fact, her own brand. She doesn’t have a media kit posted publicly in her blog (well-known bloggers, usually over 1 million followers, no longer use a media kit as brands contact them anyways, but you have to get there first!).
Eva knows exactly what sponsors are looking for and presents it with ease: creativity, vibrant personality, multitude of photos and videos, and great numbers:
- Instagram followers: 5,5 million
- Recent brand success: an increase in sales of 181%
- YouTube subscribers: 8.2 million
- Twitter followers: 4,5 million
- Co-host of Vevo’s #1 original series ”#DIYourSelfie”
If you are only an “Instagrammer” (with no blog), your Instagram statistics will suffice. If you have a blog, you should include the following stats as well:
- Unique website visitors (either monthly or yearly; some media kits even include a graph to show growth over time. Google Analytics should be used for this. Some brands may ask for the unique visitors of a single page or post they want to advertise on; be prepared to provide this as well.)
- Domain Authority (use this tool here)
- Alexa Rank (find your rank here)
4. Give more statistics: audience
It will be helpful to further break down your audience, by looking at the analytics. This includes how many women vs men, their age, and where they come from.
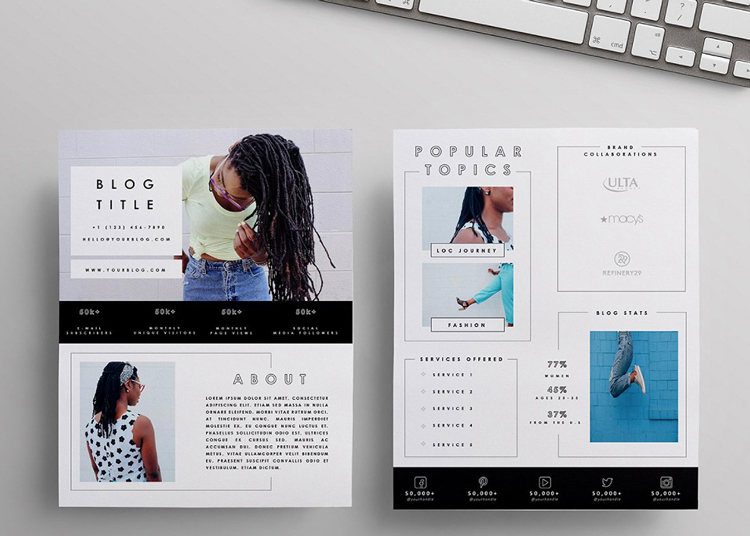
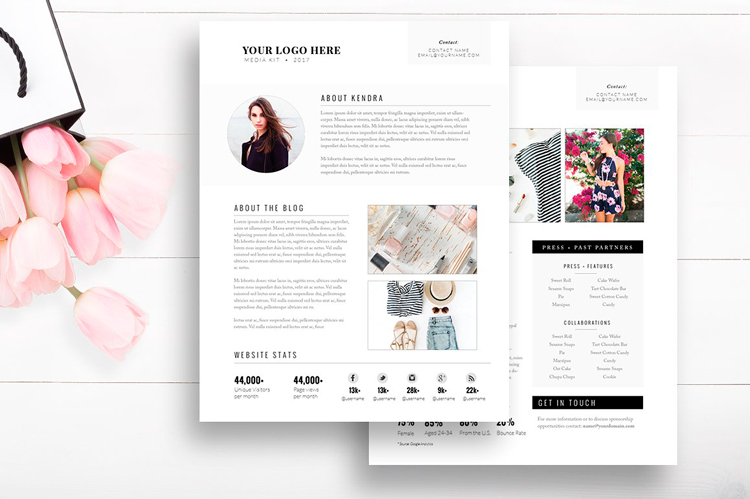
Media kit template
Most business accounts – this applies to Facebook and Instagram, too – show such statistics that you can include in your media kit. Ideally, however, you should be quoting the statistics of your blog’s visitors, and point to social media only with regards to the followers in the different platforms, just as the example above shows.
5. Highlight your achievements (don’t be shy!)
Don’t confuse your achievements with your mission statements. After you have established your mission statement, tell future brands what you have achieved, motivating them to work with you.
This is a mix of the following: what do you blog about, and who have you worked with in the past.
Let’s return to My Life As Eva. This is what her bio mentions in the following paragraph:
She is the co-host of Vevo’s #1 original series “#DIYourSelfie” and has worked with major brands including Chevy, Proactiv, Macy’s, Kohl’s, Fanta and more. Recent brand successes include Sperry Top-Siders in Journeys shoe stores. Sperry reported an increase in sales of 181% to the SKUs promoted.
She recently participated in a campaign with Fanta:
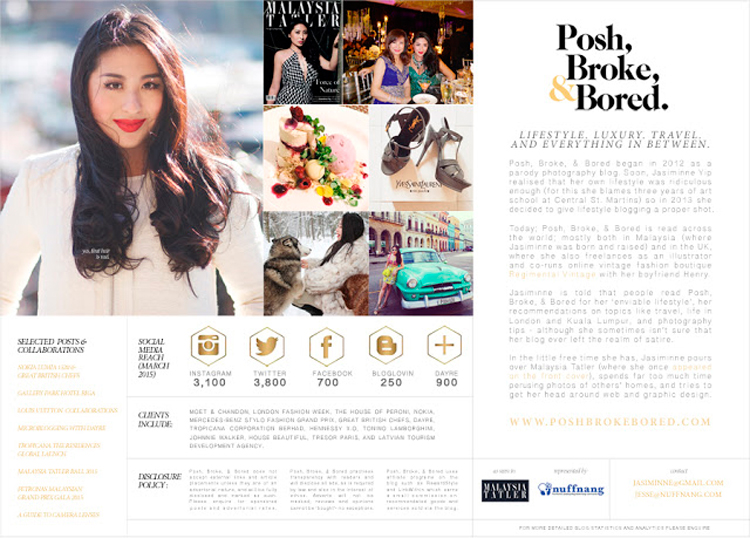
Media Kit example from poshbrokebored.com
Especially if you have not had a lot of collabs, you can name this section “Selected Posts & Collaborations,” as @poshbrokebored above shows.
To do so, it’s best to use images, posts, and videos, that illustrate and explain your work ethics and style. Don’t forget to make use of any data that you may have been given, which indicates increase in visitors or followers in your collaborator’s website! You might even choose to go fully visual and no text, but as any social media guru will agree, you need to be able to demonstrate your brand’s voice.
Whenever you do write something, be careful with your choice of words! Just like you need to keep the same visual style from the first to the last page, the same rule applies to shaping your tone of voice.
You can also include testimonials or blog awards and recognitions if you have received any. One way to get testimonials from past sponsors, clients and collaborators, is to directly message them. You can also research the comments in your blog or social media posts and look for potential reviews that you can quote in your media kit!
6. What if I’ve never done a collab before? Help!
If you’ve never done a collab before, don’t worry. You can feature images that you’ve taken with products you weren’t necessarily promoting, or simply focus on your interests. For a fashion blogger, this would be a selection of their finest outfits and photoshoots; for a food blogger, this would their innovative recipes; etc.
It’s important that you demonstrate your greatest strengths – such as, editing skills, great camera presence, or distinctive stylistic choices.
7. Tell them what you’re offering
After you’ve amazed your potential sponsors, you should mention the types of services you offer. Here are some of the most common ones:
- Social media campaigns
- Product reviews/giveaways/discounts
- Custom content marketing
- Video production
- Event media coverage
- Brand ambassadorship
- DIY tutorials
- Sponsored posts
If you don’t have any prices set, you can write that ‘prices are negotiable’. You can also have a media kit and a separate rate sheet as a PDF file, that you send over only once a client is actually interested, without making it public on your blog.
By the way, if you do not know what to charge, research online and ask fellow bloggers about their rates and compare their statistics to yours. To get a foot in the door, start out lower than you think and then when you have done a couple of collabs, post these on your media kit and start charging more based on results.
8. Make it easy to contact you
Let’s get social!
Don’t forget to include links or information about your social media and how to be reached via email or phone. Most of the media kit templates feature a link to the blog immediately after the blog’s title, followed with information regarding the phone number, email address and social media, while also featuring a reminder in the final page.
If you don’t want to repeat yourself, you can include a link to your blog, plus your e-mail address and phone number, beside your photograph in the beginning, then link your social media channels in the final ‘Get in touch’ section, or vice versa.
9. Proofread!
Now this may seem like quite the trivial step, but I cannot stress the importance of it. You have one chance to make a first impression, so you can’t afford any mistakes, especially ones you can prevent.
What’s the worst that can happen? The company you sent your media kit to is going to think you can’t spell? No. But if you can’t take the time to look over your projects and proofread them, why should they spend their on someone so frivolous?
Blogging might appear all fun and games, but if you want to earn money from it, you need to think of it as a business opportunity!
Once you’re finished with the proofread, you should save your media kit as a PDF file, which would be the best format to send forward. It’s up to you whether to attach a single page in your e-mails and link below to download the whole media kit, or send it as a single file, or perhaps entirely as a link. My advice – give them a visual and engaging preview that interests them to look over the rest!
10. Publish your media kit
For beginning bloggers, we suggest making your media kit a downloadable file on your blog. This should be on a separate landing page, with no other distracting links (you don’t want possible advertisers to leave the page without downloading!) on your blog, titled “Advertise”, “Advertising”, or even “Work with Me”. Make it easy to find by putting it in the top or bottom menu.
One option to find out who is actually interested in advertising is to require an email to download the file – this way you get the email address and can follow up with whoever downloaded your media kit!
Useful websites and templates
- The Brand Magnet – http://thebrandmagnet.com/
- The Creative Market – https://creativemarket.com/ (just type ‘blog media kit’ in the search)
- Canva – https://www.canva.com/create/media-kits/
If you’re just starting as a blogger and want to improve your social media strategy, check out some proven tips in my last article on how to get 15,000+ followers on Instagram!
Digital Marketing & Social Media Internship Seminar in Madrid, Spain